Dorayaki (Red Bean Paste Pancake Sandwiches)

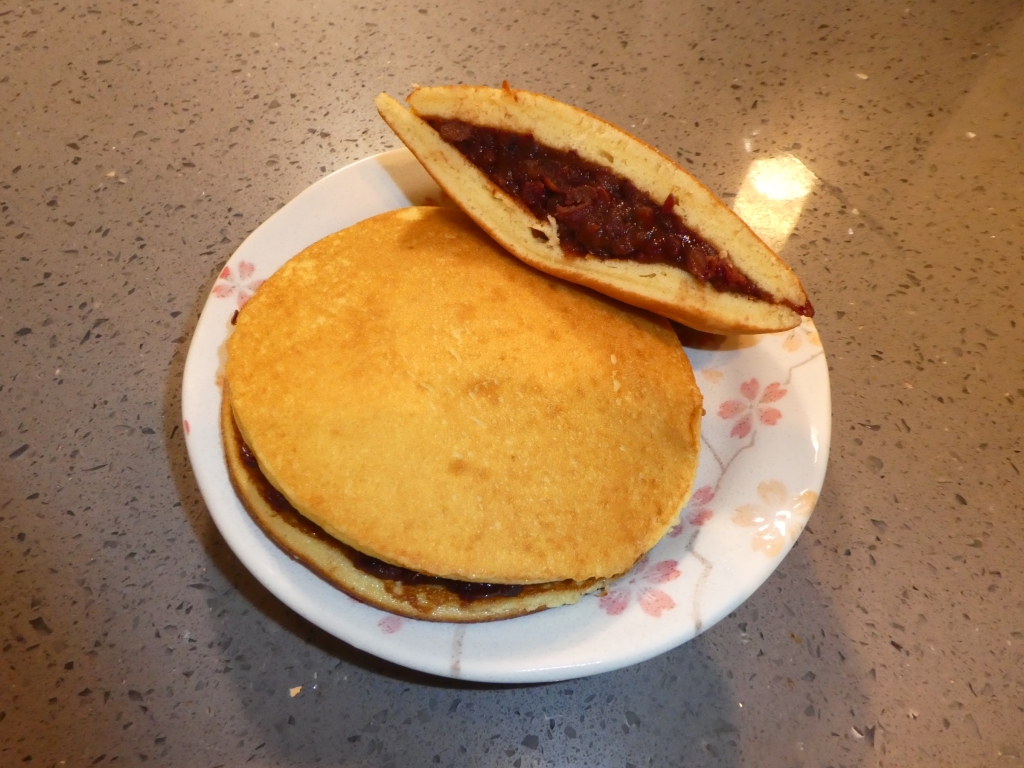
These dorayaki (Japanese), tong luo shao (Chinese), a.k.a red bean paste pancake sandwiches, are very tasty, especially if you like honey-flavored pancakes and red bean paste. If you want them to look perfectly uniformly golden-brown, then you need a very good nonstick pan. Otherwise, you can make them as you normally cook pancakes and they’ll taste just as good.

Original recipe


Dorayaki (Red Bean Paste Pancake Sandwiches)
From Just One Cookbook

Yield: 6 dorayaki

  • 4 large eggs (50 g each w/o shell)
  • 140 g sugar
  • 2 Tbsp honey
  • 160 g all-purpose flour
  • 1 teaspoon baking powder
  • 1-2 tablespoons water
  • Neutral-flavored oil, such as vegetable, rice bran, canola, etc. for greasing the pan
  • 520 g red bean paste
  1. In a large mixing bowl, whisk together eggs, sugar, and honey until well combined.
  2. Whisk in baking powder, then sift flour into the mixture. Whisk until combined.
  3. Cover and chill in the refrigerator for 15 minutes.
  4. The batter will look more smooth now. Whisk it again, then whisk in 1-2 tablespoons of water so that when you lift your whisk, the batter falls back into the bowl in loose ribbons. (I recommend watching the video to check the consistency.)
  5. Heat a large nonstick pan on medium-low, nearly low, heat for about 5 minutes. You need to use a good nonstick pan, or the pancakes will stick to bottom. You also don’t want the pan to get too hot.
  6. When the pan is preheated, dip a paper towel in oil and coat the bottom of the pan. Then use a clean paper towel to basically wipe off all the oil. That will enable you to get uniformly golden-brown pancakes.
  7. Using a 1/4-cup measuring cup, pour 3 tablespoons batter into the pan from about 3″ above the pan. The batter will spread into a 3″ circle.
  8. Cook until the surface of the batter just starts to bubble, then flip and cook the other side. The timing will depend a lot on your stove and pan, so watch it closely and experiment. Don’t get too frustrated if you end up throwing out the first couple pancakes.
  9. Transfer cooked pancake to a plate and cover with a damp towel to prevent it from drying out.
  10. Make the remaining pancakes in the same way. If your nonstick pan is good enough, you won’t need to re-oil the pan between pancakes. (If it’s not good enough, like mine, just use more oil; the pancakes will look splotchy but still taste good.) You should get about 12 pancakes total.
  11. Divide red bean paste into 6 equal portions. Spread it across 6 pancakes, mounding more in the centers so the dorayaki will be fatter there. Sandwich the red bean paste with the remaining pancakes.
  12. Wrap dorayaki in plastic wrap until ready to serve. Wrapped, they can be kept in the refrigerator for up to 2 days or frozen in a freezer bag up to 1 month.

You Fan (Taiwanese Sticky Rice)

This is one of my favorite dishes that my mom makes, and I finally tried it myself! Technically it’s not supposed to have Cantonese sausage because it’s a Taiwanese dish…but I think Cantonese sausage makes everything better.

Note: The recipe calls for the Tatung style of rice cooker where you have an inner pot for the ingredients and an outer pot for the water that boils off into steam. If you don’t have a rice cooker like that, you can improvise using a large pot of water. Put your sticky rice mix in a big bowl (it won’t expand much while steaming), possibly on a rack or upside-down bowl to keep it out of the water. Cover the pot with a lid, bring water to a boil, and steam for 30 minutes. Make sure the water doesn’t all boil off.


You Fan (Taiwanese Sticky Rice)

Yield: 4-6 servings

  • 5-10 dried shiitake mushrooms
  • 1 large pork chop (about 1/2 lb), cut into 1/2-inch chunks
  • 1 teaspoon sugar
  • 1 teaspoon cornstarch
  • 1 teaspoon oyster sauce
  • 1 teaspoon rice wine
  • Dash of ground black pepper
  • 3 Cantonese sausages
  • 3 tablespoons flavorless oil, such as canola
  • 4 cloves garlic, minced
  • 2 tablespoons soy sauce (if using dark soy sauce, use 1 tablespoon of it plus 1 tablespoon water)
  • 1 1/2 cups sticky rice, rinsed and drained
  • 1 1/2 cups water
  1. In the morning, put dried shiitake mushrooms in a medium bowl with water.  Allow them to soak for several hours, until they are fully softened.  Gently squeeze out some of the water from each, discard the stem, and chop into ½-inch chunks.  Set aside.  Reserve the water for later.
  2. Cut the pork chop into 1/2-inch chunks.  Mix together with sugar, cornstarch, oyster sauce, rice wine, and pepper.  Set aside.
  3. Cut the sausages into 1/2-inch slices, then cut each in half into a semi-circle.  Set aside.
  4. Heat oil in a wok or large pan.  Add minced garlic and mushrooms and cook until fragrant.
  5. Add pork and sausage and cook until pork is basically done.
  6. Stir in soy sauce and sticky rice.
  7. Add enough water to the reserved mushroom water to make 1 1/2 cups total.  Add it gradually to the rice, stirring until it is completely absorbed before you add more.  Stir continuously, or the rice will stick.
  8. Transfer the rice mixture to the inner pot of a Tatung rice cooker.  It will not expand much more as it steams.
  9. Put 3/4 cup water in the outer pot of the rice cooker and steam.  It will take about 30 minutes.  Leave the lid on for another 20 minutes.
  10. Serve.

Apple Cheddar Rye Pie

This pie takes 2 days to make, but it’s well worth the effort. The crust is flaky, and the savoriness of the cheddar cheese pairs very nicely with the spicy sweetness of the apples. The thick lattice also has a striking visual effect.

Here are the original recipes:


Apple Cheddar Rye Pie
Adapted from Food & Wine

Yield: 8-9″ pie

For the crust:

  • Ice cubes
  • Cold water
  • 1 tablespoon apple cider vinegar OR white vinegar
  • 2  cups unbleached all-purpose flour (about 10 5/8 ounces), plus more for rolling
  • 1/2 cup (2 1/4 ounces) rye flour
  • 1 teaspoon granulated sugar
  • 1 teaspoon kosher salt
  • 1 cup unsalted butter, chilled
  • 1 ounce finely-shredded aged white cheddar cheese (about 1/3 cup)
  • Softened butter, for greasing

For the filling:

  • 2 pounds Northern Spy, Idared, Golden Delicious, or Granny Smith apples (about 5 medium apples), peeled, cored, and cut into 1/2-inch-thick slices
  • 1 teaspoon lemon juice
  • ¾ cup granulated sugar
  • ¼ cup firmly packed light brown sugar
  • ¼ cup tapioca starch
  • ½ teaspoon ground nutmeg
  • ¼ teaspoon ground cinnamon
  • ¼ teaspoon kosher salt

Additional Ingredients:

  • 1 teaspoon turbinado sugar
  • 1 teaspoon all-purpose flour
  • 1 large egg, beaten

Make the crust (at least 8 hours and up to 3 days in advance):

  1. Fill a 1-cup liquid measuring cup with ice cubes. Add cold water to fill (at least 1/2 cup). Stir in apple cider vinegar. Set aside.
  2. Stir together flours, sugar, and salt in a large bowl.
  3. Add butter, and toss to coat in flour mixture. Using a bench scraper, cut butter into roughly 1/2-inch cubes. Using your hands, quickly separate butter cubes, and toss to coat in flour mixture. Using bench scraper, cut butter pieces in half to form 1/4-inch pieces. Using a pastry blender, cut in butter, rotating bowl after each cut, until mixture is crumbly with a few larger pea-size pieces of butter, stopping to clean pastry blender as needed.
  4. Stir in white cheddar cheese and quickly mix with a pastry blender to incorporate.
  5. Add 6 tablespoons vinegar mixture. Using a bench scraper, pull flour mixture from one side of bowl to the other until there are no longer visible pools of liquid. Using your hands, scoop up a large handful of dough mixture and press firmly down into bowl. If dough doesn’t begin to stick together, add an additional 2 tablespoons vinegar mixture, 1/2 tablespoon at a time, mixing well after each addition. Rotate bowl a quarter turn, and repeat scooping and pressing until a rough ball of dough forms.
  6. Divide dough in half. Pat each half into a 1-inch-thick disk. Tightly wrap each dough disk in plastic wrap. Chill dough disks at least 8 hours and up to 3 days.

Roll pie dough:

  1. Place 1 dough disk on a lightly-floured surface. Pound dough disk about 4 times with a rolling pin to begin flattening. Rotate dough 180 degrees; repeat pounding once.
  2. Press and roll along edge of dough to enlarge dough disk, flouring surface as needed to prevent sticking. Rotate dough disk, and repeat rolling until dough forms an 8-inch circle. (Dough will be thicker in center.)
  3. Place rolling pin in center of dough circle, and press firmly as you roll away from yourself, stopping about 1 inch from edge to avoid over-rolling. Repeat rolling procedure, rotating dough 45 degrees after each pass, until dough forms a 13-inch circle (about 1/8-inch thick), flouring surface as needed to prevent dough from sticking. If top of dough starts to stick to the rolling pin, flip dough over and roll other side. Run rolling pin over dough circle once more to ensure even thickness.
  4. Using a knife, trim any jagged edges to form an even 13-inch circle.
  5. If you’re worried about the pie sticking, lightly grease a 9-inch disposable aluminum pie pan with softened butter. (I didn’t and it was fine.)
  6. Fold dough in half, and transfer to pie pan. Unfold dough, and gently press into bottom and up sides of pan.
  7. Chill pie shell while preparing filling and rolling top pie dough.
  8. Roll second dough disk into a 13-inch circle according to instructions above. Cut into 6 (2-inch-wide) strips. Transfer to a baking sheet lined with parchment paper, and chill until ready to assemble pie.

Make the filling:

  1. Toss together apples and lemon juice in a large bowl.
  2. Stir together granulated sugar, light brown sugar, tapioca starch, nutmeg, cinnamon, and salt in a small bowl.
  3. Pour sugar mixture over apples, and toss with your hands until evenly distributed.

Assemble the pie:

  1. Stir together turbinado sugar and flour in a small bowl. Sprinkle bottom of unbaked pie crust with sugar-flour mixture.
  2. Spoon apple mixture into piecrust, being careful not to mound in center.
  3. Place one dough strip across center of filled pie. Place a second strip across center perpendicular to the first, creating a cross. Arrange next two strips parallel to first strip, placing on either side. Working with original strip, fold back both ends toward center. Place last two lattice strips on either side of the second (perpendicular) strip. Fold original strip back down so that it lies across and on top of newly-placed strips.
  4. Trim overhanging lattice strips flush with edge of pie pan.
  5. Using your fingers, tightly roll dough overhang toward center of pie, creating a ring of dough that rests on lip of pie pan. Using your thumb and index finger, form a “C,” and position that hand in the very center of the pie pan. Position your opposite thumb on outside of pan. Use “C” fingers to push and press rim of dough up and away from pan, simultaneously pressing the thumb of your other hand into the opening of the “C” to make a crimp. Continue until entire ring of dough is crimped.
  6. Freeze crust until hardened, at least 15 minutes or up to 8 hours. Proceed to baking, or wrap tightly in plastic wrap, and freeze up to 1 year.
  7. Preheat oven to 450°F.
  8. Remove pie from freezer, and place on a rimmed baking sheet lined with parchment paper. Brush lattice and crimped edge lightly with beaten egg.
  9. Bake until crust is evenly golden brown, 15 to 20 minutes. Without removing pie from oven, reduce oven temperature to 325°F, and continue baking until pie juices are bubbling in center, 50 minutes to 1 hour and 10 minutes.
  10. Remove baking sheet from oven, and transfer to a wire rack. Let pie cool completely before slicing, 4 to 6 hours.
  11. Store leftover pie, covered, at room temperature up to 2 days.